When you have heavy-duty situations, you need a heavy duty epoxy floor coating system that can stand up to what you throw down. The epoxy mortar system from Epoxy Coating Specialists in Kansas City is a serious, 5 coat fuel resistant flooring application that resists wear, impact, fuels and chemicals.
It’s the prime system that’s a perfect choice for your heavy duty requirements.
The epoxy mortar system for heavy-duty applications
Our epoxy mortar system performs excellently for both new construction and rejuvenation of any existing concrete slab. If you’re seeking a long term, sustainable floor solution, this is the one for you.
Who needs heavy duty epoxy floor coating?
- Industrial Manufacturing
- Airport Plane Hangars
- Maintenance and Repair Shops
- Military Applications
- Large industrial storage warehouses
When aviation and aerospace facilities work with Epoxy Coating Specialists, they get high-performance 5-coat fuel resistant epoxy flooring that’s both beautiful and durable. We work with both new and renovation applications to protect your facility’s concrete from hazards such as:
- Aviation fuel
- Aircraft fluids (such as Skydrol®)
- Lubricants
- Chemicals
- Aircraft and equipment weight
- And more
Additionally, industrial epoxy floors are resistant to both stains and slips—ensuring that your floor looks great and keeps employees safe.
An experienced and certified project manager will help design a heavy duty epoxy floor coating system for your facility in Kansas City or any of our regions, that’s not only tough and durable but aesthetically pleasing as well.
All of that said, don’t let the large-scale application scare you if you’re looking for personal use. If you believe your situation warrants this kind of system, Epoxy Coating Specialists will certainly talk with you about what you need and the ways to achieve your durable flooring goals.

Benefits of an Epoxy Mortar System
- Restoration of eroded or worn-out concrete
- Increased durability for areas with heavy-duty needs
- Long-term lifecycle for protection of concrete
- Provides Smooth & Level Surface
- Sloping the floor to drains
It starts at the bottom—with the substrate
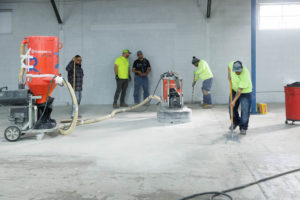
Before installing a heavy duty epoxy floor coating, we will take your floor all the way down to the original concrete or cement surface, also known as the “substrate.”
If there’s tile down, we’ll remove 100% of tile employing one or more of the following techniques:
- Chipping
- Scraping
- Sanding
- Scarification
- And/or various hand tools
Fuel-Resistant Flooring Prep: Hairline Cracks
Hairline cracks, or cracks having no more than 1/8” width typically receive repair using an epoxy based patching compound. However, cracks greater than that can be chased to a minimum depth of 1/2” and sealed using the procedures and materials specified for joints, mainly polyurea joint filler
We repair cracks more than 3/4” wide using either epoxy mortar or epoxy concrete. These sealed cracks work for your substrate to combat uneven floor surfaces.
Fuel-Resistant Flooring Prep: Joints
Old floor joints, and more specifically their filler, can weaken your new heavy duty epoxy flooring system. That’s why Epoxy Coating Specialists digs deep into those joints to remove 100% of the existing material.
This removal includes material bonded to joint walls and base. The more rigid material may require saw cutting equipment to remove. During this re-saw cutting, the joints may be widened up to 1/4”. We’ll address that in the application stages that follow, to make sure your floor is smooth and stable.
Fuel-Resistant Flooring Prep: Coating Removal
If your substrate already has an epoxy coating (or any other coating) on it, we’ll remove 100% of the existing coating system.
There are several techniques we may use:
- Diamond Grinding
- Shot blasting
- Scarification
- Impact tools
Diamond grinding or light scarification may be done to any areas inaccessible to shot blasting, such as perimeter wall bases and under secured equipment.
In general, shot blasting cannot completely remove a coating system. For our team to attain 100% coating removal, we’ll apply a combination of tooling to finish the task.

How to know the substrate is ready
Once we’ve finished the prep task, Epoxy Coating Specialists test the surface to be sure they’re ready for the epoxy mortar system application.
The substrate must appear clean and contain the appropriate concrete surface profile level. Once our technicians determine the substrate has been prepared in an adequate way they will place numerous drops of water on the surface.
If the water drops soak into concrete, the surfaces are hydrocarbon-contamination free (oils, grease, and/or skydrol). If the water drops bead up and do not flatten out, surfaces likely will require additional degreasing.
We’ll also check for smoothness of the substrate surface. Shot blasting coarse concrete or broom-finished concrete can produce a coarseness level equal to ICRI 310.2R CSP 5. We will employ a best-effort attempt to minimize over-shot-blasting of coarse concrete.
ICRI stands for International Concrete Repair Institute, an industry-standard organization dedicated to the education of
concrete repair specialists, and to improving and enforcing the quality of concrete restoration, repair, and protection. Membership in the organization requires adherence to these standards of excellence, which are codified by the organization and referred to above and throughout Epoxy Coating Specialists’ work descriptions.
If the floor technician encounters coarse concrete, shot blasting to a level of coarseness equal to ICRI 310.2R CSP 5 is acceptable. Extremely coarse concrete can require resurfacing prior to the flooring system’s installation.
Finally, we will sweep, vacuum, and run a high powered magnet over all surfaces to be coated, including joints.
Customized to your needs
Every heavy duty 5-coat fuel resistant flooring system we install has unique requirements not only for preparation, but for floor usage requirements and expectations. Epoxy Coating Specialists installs and services a number of military floors, including projects like large airplane hangars, vehicle depots, and repair facilities.
We address your specialty wall bases, key-in terminations, floor drain embedments, and any other unique details, achieving adherence to all codes and manufacturer’s recommendations
For example, each military project requires very specific detailing of expected procedures. We will gladly create detailed application protocol sheets that match your facility stipulations. Years of experience with private, commercial, and government contracting have prepared our staff to not only do the work, but to define it and set clear expectations from day one.
Contact us, and let’s create a game plan that will suit the situation, and the suits involved with the situation’s decision-making.
Heavy Duty Epoxy Floor Coating in Kansas City – Building the Surface
We create your new floor surface through a 5-coat, nominal 1/4” troweled epoxy mortar process system. This system both resurfaces eroded concrete and protects existing concrete from damage.
As one of the main goals, this 5-layer system also resists fuel and protects your floor from a wide range of chemicals and high traffic. You will get high-performance epoxy flooring that’s both beautiful and durable.
(INSERT PIC FROM GOOGLE FOLDER: ECS 5 LAYER GRAPHIC SCREENSHOT FROM WEBSITE.png)
The system starts with the prepared substrate and builds up from there:
- Primer
- Mortar
- Grout coat
- Build coat
- Top coat
Primer
The first step applies an epoxy primer to your prepared substrate at a minimum of 250 microns 10.0 mils wet. This primer penetrates the substrate, providing a primary base of stable adhesion.

Mortar
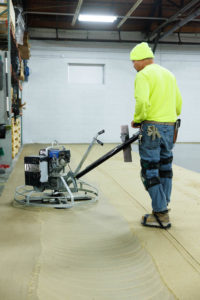
Next, Epoxy Coating Specialists applies the epoxy mortar at a 1/4” depth directly into the wet primer using a screed box or equal equipment. We’ll finish the large open areas using a power trowel with stainless steel blades. Perimeter edges and adjacent equipment footings may require finishing by stainless steel hand trowel.
After the layer has cured sufficiently, we will diamond grind the entire mortar surface. The resulting surface must appear level, contain uniform thickness, and be free of surface imperfections including trowel marks.
Grout Coat
You will have already selected your top coat color during our consultation and planning sessions, so at this stage, we will select a grout coat color identical to the selected topcoat color.
After sweeping and vacuuming up residual dust from the epoxy mortar sanding, we’ll apply our grout coat to the epoxy mortar at a minimum of 250 microns 10 mils wet. This coat works to seal up the troweled mortar bed and provide yet another layer of substrate protection from any kind of fuel, chemical, or liquid. Plus, the grout layer adds strength and durability to the surface.
We will check the cured grout coat, and if it feels oily or greasy, that indicates the occurrence of an amine blush. Epoxy amines can blush during cool temperatures with high humidity. We will remove the blush and ensure that the final surface is ready for sanding.
After approval of the curing stage, we will sand your grout coat using 100 grit or finer sandpaper to a dull appearance with visible scratches. The resulting surface must appear 100% absent of gloss with zero shiny spots.
Build coat
To achieve an exquisite finish we apply a second coat called a Build Coat. The second coat is installed to ensure the mortar absorption levels are consistent and evenly smooth on this epoxy layer, ensuring a beautiful finish with the top coat.
Top coat
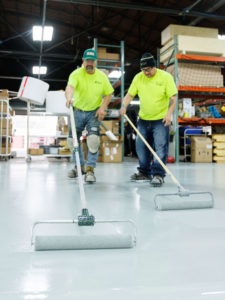
This final stage of your heavy duty epoxy floor coating system requires application of a high wear urethane topcoat.
The topcoat goes on at a spreading rate from approximately 4 to 5 mils During this application we will broadcast No. 60, white, aluminum oxide non-skid grit into it. Aircraft hangars servicing light aircraft with weight less than 40,000 pounds may require a higher non-skid grit loading.
The additional grit will assist in towing aircraft under wet conditions; however, this may also decrease coating aesthetics.
On either warehouse or architectural floors, considerably less non-skid grit may be appropriate. Broadcast rates can range from none to less than 1.0 pound per 1000 square feet. How much we’ll use based solely on your needs, which are fully delineated in our planning stages.
Curing time
This final stage of heavy-duty epoxy flooring takes about 48 hours to completely cure, though we have had some customers begin using the floor within 24 hours of final application.

Process length
Since Epoxy Coating Specialists keeps supplies and tools on-hand, we get to your project quickly and expertly. The average time it takes to install this epoxy mortar system, minus the final curing time, is 4 to 5days. That time applies to very large facilities too.
We’ll also work nights and weekends to ensure that your project is completed within the timeframe provided.
When you need the best, call the best
Each project has different needs and the materials Epoxy Coating Specialists uses—both type and quantity—will vary as a result. Thanks to our resources, craftsmanship, and personnel, we’ll ensure that the products used for your project will be both high-quality and fit the unique needs of your facility.
Though we primarily apply our heavy duty epoxy floor coating in Kansas City and a six-state region, we are happy to bid jobs anywhere in the continental U.S. We’re there for you, wherever “there” may be.
Request a quote to work with the area’s most accommodating, hardest working group of qualified industrial coating specialists. And contact us with any of your heavy duty epoxy floor coating questions. We can’t wait to hear from you!