
When it comes to concrete prep for epoxy flooring, we work from the bottom up—literally. Without concrete prep for epoxy flooring, the subsequent layers won’t bond correctly, and all that work will have to be redone.
At Epoxy Coating Specialists, we believe in doing it right the first time, so that we don’t waste your time or ours. Our staff has performed thousands of projects for countless different industries including aerospace, sports arenas and stadiums, automotive dealerships, restaurants, each branch of the military and more. We’ve installed over 30 million square feet of flooring during our time in business.
There’s no project that we can’t take on, from home garages to airplane hangers, with each project receiving the best work in the business. Contact us with questions, and read on for how we take you from sloppy slab to happy customer.
Getting to the Bottom of the Issues
The substrate is your base, original concrete floor or cement pad. To get to this foundational layer of your new epoxy flooring system, our concrete prep for epoxy flooring will have to remove previous layers of old flooring. This will include the top layers (carpet, VCT, sheet rubber, quarry tile), and any underlying flooring (carpet pad, mortar bed, mastic, glue).
We need to make sure the cement is 100% ready to accept and adhere to the new layers of flooring system. Therefore, Epoxy Coating Specialists puts the surface through multi-point testing.
The substrate must appear clean and contain the appropriate concrete surface profile level. Our technicians check levels at multiple locations, determining if the substrate has been prepared adequately. If not, we revisit the area.
When the substrate passes this first test, we’ll place numerous drops of water on the surface. If the water drops soak into concrete, the surfaces are hydrocarbon-contamination free (grease, oil, skydrol, etc.). If the water drops bead up instead of flattening out, the surface likely will require additional degreasing. Plus we make sure there won’t be moisture issues now or in the future that could shorten the lifespan and functionality of the flooring system.
Even if the flooring is just carpet/wood/linoleum/etc, there may be glue loops, blobs/pools of construction adhesives or paint, pieces of flooring that won’t come up with regular removal. Add to that substrate surface issues (bumps, lumps, screws, wood/metal insert stubs, etc) exposed by the removal of those upper layers.
We’ll remove 100% of the previous flooring using one or more of the following techniques:
- Chipping
- Scraping
- Sanding
- Scarification
- And/or various hand tools
Coating Removal
It could also be that your floor already has an old, failing epoxy or polyaspartic floor system. As with any other old flooring, we’ll remove 100% of the existing coating system.
To get to a workable substrate, we’ll remove the uppermost layers as best as possible, knowing that this kind of flooring is practically welded to the substrate, and will need true grit to remove. And we’re not kidding when we say “grit.” We’ll grind the coating off and get to the concrete, allowing us not only a great starter surface, but helping us make sure any other issues are addressed.
Hairline Cracks & Joint Repair
Hairline cracks, or cracks having no more than 1/8” width typically receive repair using an epoxy based patching compound. But if the concrete prep for epoxy flooring gets down to the concrete and it exposes cracks greater than 1/8”, we’ll chase them to a minimum depth of 1/2” and seal them using mainly polyurea joint filler
If they’re really bad and more than 3/4” wide, ECS repairs those canyons using either epoxy mortar or epoxy concrete. Doing this not only seals the cracks, it also works for your substrate to combat uneven floor surfaces.
We’ll inspect all older floor joints, and more specifically their filler. The problem with previous work is that if it’s old—or poorly done—that can weaken your new heavy duty epoxy flooring system. Our inspectors won’t stand for it, and we’ll dig deep into those joints to remove 100% of the existing material.
That removal doesn’t stop with the cracks. We’ll also include removal of material bonded to joint walls and bases. Some of that more rigid material may require saw cutting equipment to remove, but don’t worry. We’re fully geared up for every job, with either the tools on site or available at our offincesto get it done.
During this re-saw cutting, the joints may be widened up to 1/4”. As mentioned above, we’ll address all joints, cracks, and flaws to make sure your floor is smooth and stable.
Creating a Smooth Substrate
As you can tell, concrete prep for epoxy flooring can be quite the struggle to get down to a decent beginning substrate. Once our Epoxy Coating Specialist team achieves a mostly-cleared, filled surface, then we can start the process of turning it from a scarred, less than attractive expanse of concrete, into the floor you want and need.
There are several techniques we may use to create a substrate that’s ready for the application of the epoxy flooring system.
Diamond Grinding
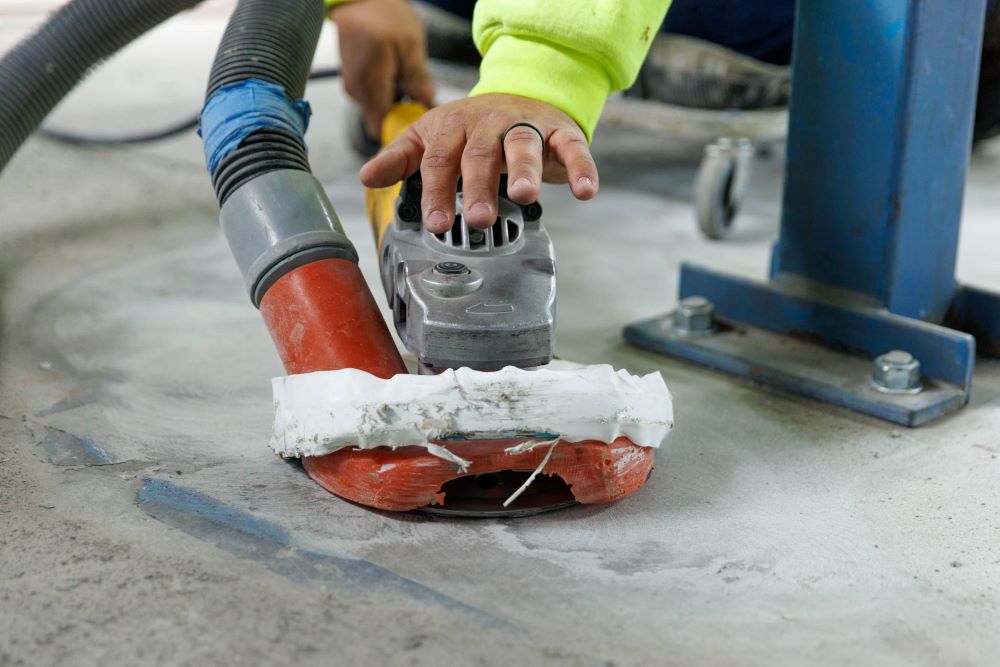
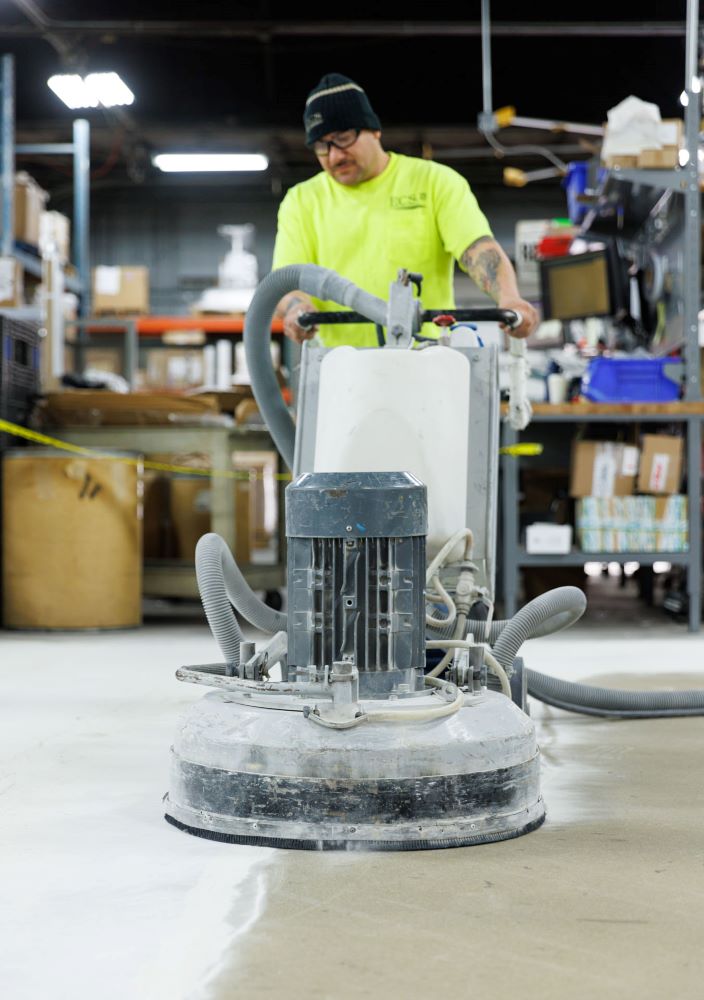
Our diamond grinders range in size from single-head to multi-head, and are chosen for the jobsite depending on the square feet of substrate that needs to be smoothed. Most are stand-behind units with a vacuum dust remediation system either built-in or connected by a vacuum hose.
The grinder spins multiple rotating discs on the substrate surface. Armed with diamond bits, these discs provide extraordinary abrasion capability. As the discs spin, this concrete prep for epoxy flooring corrects irregularities in the concrete/cement, such as small divots, minor pits, faulting and roughness, along with any debris not taken care of by our initial removal techniques.
This step in the epoxy floor system preparation can take care of issues such as:
- Faulting at joints and cracks
- Wheel ruts worn into the pavement
- Light spalling cause by chemicals or impacts
- Uneven original surfaces
If we equip the diamond grinder with finer grit diamond bits, the grind can work as a polisher in a later stage of layer application, making for a truly smooth surface for final coats.
Epoxy Coating Specialists will inspect your floor thoroughly before using a diamond grinder. Diamond grinding doesn’t suit every floor issue, and isn’t a good choice if your substrate has weak supporting soil, or needs a lot of repairs to make it functional again.
To use a diamond grinder, we’ll need your concrete to be structurally sound and stable. Diamond grinding may also be done to any areas inaccessible to shot blasting, such as perimeter wall bases and under secured equipment.
Shot Blasting
This machine comes in several size applications, from a smaller walk-behind unit, to ride-behind and ride-on units. The unit chosen for your project depends on the size and scope of the project substrate.
As shot blasting indicates, we load each machine with steel “shot”, or small balls of metal. These come in different grits/sizes to score the substrate surface with different degrees of roughness/smoothness. It’s also one of our strategies for removing previous epoxy flooring system layers. However, in general shot blasting cannot completely remove a coating system. For our team to attain 100% coating removal, we’ll apply a combination of tooling to finish the task.
For example, a thick mil flooring system might need a rougher profile to allow stronger surface adhesions for the oncoming layers. A thin mil system might require a finer grit for a smoother surface, since there will be fewer layers before the finish coat.
A “blast wheel” spins under the shot blaster, scouring (blasting) the substrate by propelling the shot against the concrete. As it moves, a built-in vacuum system extracts the airborne particulate created during this abrasion process.
After shot blasting the substrate, we go over the surface with another round of vacuuming and cleaning so that the cement is completely clean and ready for the next step in the epoxy flooring process.
Scarification
Our scarification machines work both as hand-held devices, and walk-behind. They employ a rotating horizontal drum with rows of carbide or steel blades/cutters mounted on the drum’s surface. As the drum spins, the blades chip, scrape, and level the substrate The system’s built-in vacuum sucks up the resultant loose materials.
These powerful scarification tools can remove from 1/4” to 2 inches of substrate surface in a single pass. This aggressive concrete prep for epoxy flooring digs deep into the surface. It’s good for:
- Removing contaminate floor surfaces
- Efficiently removing previous coatings
- Aggressively addressing uneven joints or bumps
- Quickly scoring a substrate surface
- Pepping a surface for finishing with diamond grinding and/or shot blasting
Because scarification is such an aggressive process, for most floors we follow it up with another process to finish prepping for the next step.
Dust Control
Every process we use for concrete prep for epoxy flooring involves dust control. Each unit has vacuum filtration and remediation either built-in or as an attachment. After initial surface prep, we vacuum the substrate again.
We can also cover any pieces that aren’t removable from the work area, such as anchored/built-in warehouse racks, and static inventory or machinery. Ventilation fans can further expel dust from the area and help to make a clean environment for our staff to finish the project, and for your operations to continue without hesitation.
ICRI Compliant for Quality
We set our standards in compliance with the International Concrete Repair Institute, or ICRI. This industry-standard organization educates concrete repair specialists around the world, always seeking to improve and enforce quality concrete restoration, repair, and protection.
Membership in the organization requires adherence to these standards of excellence, which are codified by the organization and referred to throughout Epoxy Coating Specialists’ work descriptions.
Finally, after all the checks are done and the surface passes our stringent QA, we will sweep, vacuum, and run a high powered magnet over all surfaces to be coated, including joints. All of this in accordance with our agreed-upon timeline!
When You Need the Best, Call the Best
Each project has different needs, and the type of concrete prep for epoxy flooring will vary as a result. Thanks to the resources, craftsmanship, and personnel at Epoxy Coating Specialists, we’ll ensure that the prep work and floor system are the best for your garage, your facility, any project you may have no matter the size.
Request a quote to work with the area’s most professional, dedicated group of qualified industrial coating specialists. And contact us with any of your heavy duty epoxy floor coating questions. We can’t wait to hear from you!